SketchUp for woodworking: the right tool for your workshop?
SketchUp for woodworking: strengths, real limitations and practical setup. An honest guide for woodworkers and cabinetmakers.
SketchUp for woodworking: the right tool for your workshop?
SketchUp is everywhere in wood shops. But is it really the best choice for a woodworker or cabinetmaker? Here’s an honest look at what it does well, its real limitations, and how to get the most out of it.
SketchUp has been a go-to tool for 3D wood design for over twenty years. Intuitive, well documented, and backed by an active community worldwide, it comes up in virtually every conversation among woodworking professionals and hobbyists alike.
But popularity doesn’t mean it’s the right tool for everyone. Some woodworkers swear by it. Others spend weeks learning it only to realize it doesn’t really match the way they work. Before investing your time and money, here’s what you need to know.
What SketchUp does really well for woodworking
Visualize a project in 3D before cutting
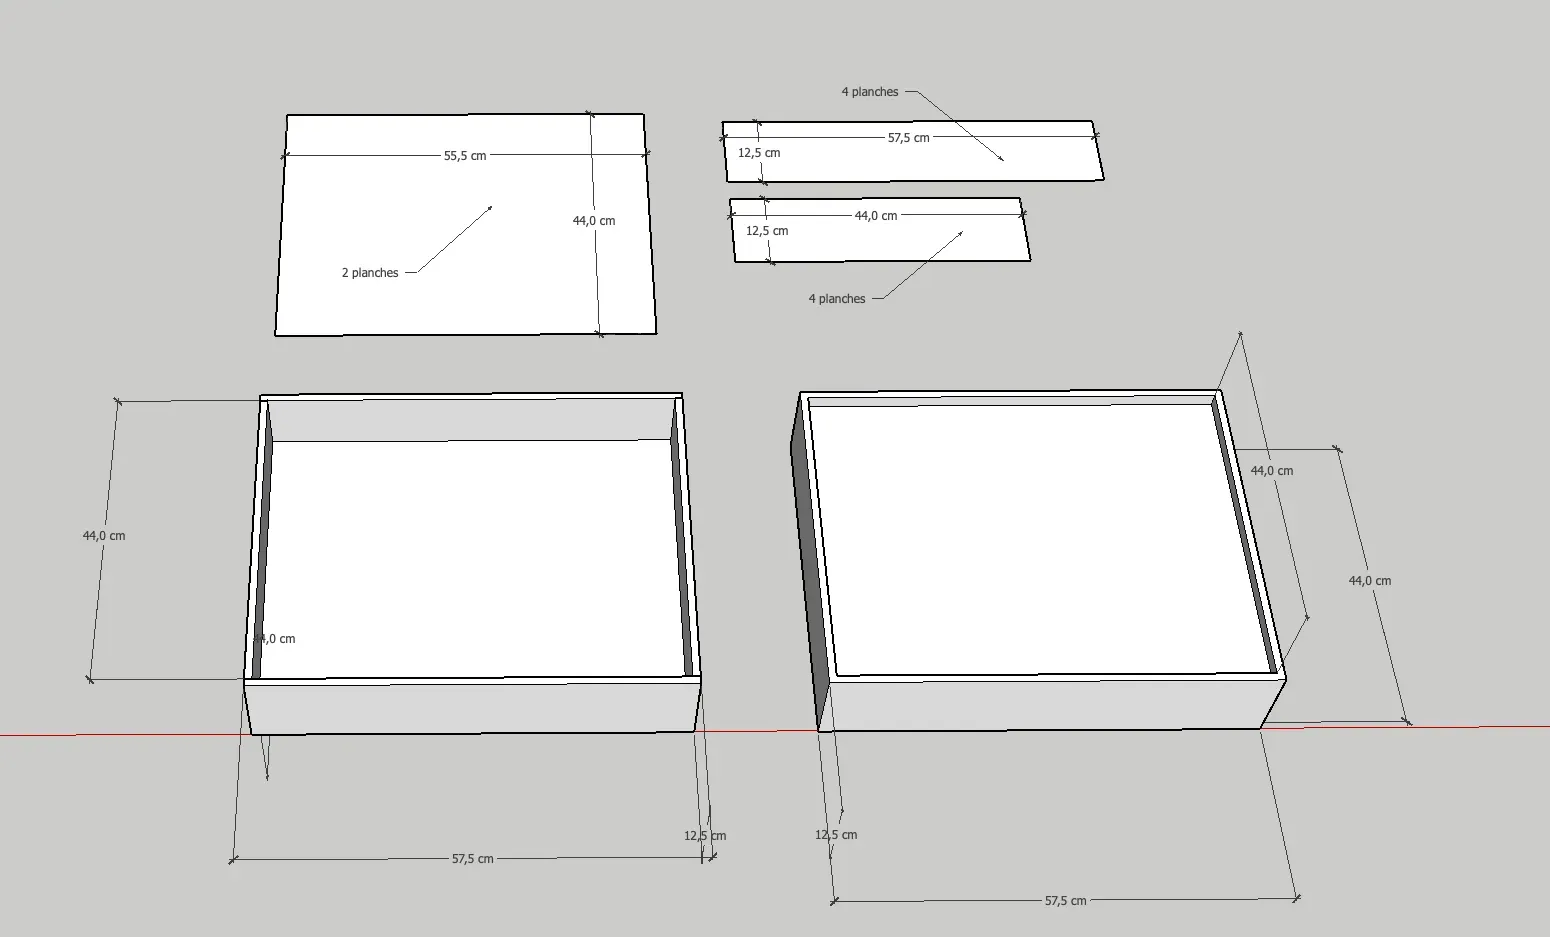
This is SketchUp’s undeniable strong point. Model a piece of furniture, a kitchen, or a staircase, rotate it freely, view it from the front, side, in cross-section — it’s a real advantage. You catch proportion, assembly, or clearance issues before you’ve touched a single board. For presenting a project to a client, it’s hard to beat at this price point.
The 3D Warehouse, SketchUp’s built-in library, offers thousands of components: furniture, hardware, architectural elements. A genuine time-saver when designing custom cabinetry or fitted kitchens.
Present your work to clients
For woodworkers doing custom work, SketchUp has become a sales tool. A realistic rendering of a bookcase or kitchen before production is far more convincing than a paper drawing. Combined with LayOut (SketchUp’s companion page layout tool), it lets you produce clean dimensioned drawings to hand to the client or bring to the workshop.
A fast learning curve compared to other CAD software
Compared to Fusion 360, FreeCAD, or SolidWorks, SketchUp is approachable. Most woodworkers who commit to learning it describe a tough first week, then rapid progress. Resources are plentiful, including dedicated woodworking courses from providers like Form2Fab and Adebeo, as well as large online woodworking communities.
The real limitations of SketchUp for wood professionals
No parametric modeling
This is the most significant limitation for anyone working with precision. In SketchUp, if you draw a cabinet at 600 mm wide and the client changes their mind to 550 mm, you don’t just update a value — you rework the model by hand. Parametric modeling, where dimensions drive the model and everything recalculates automatically when you change them, is not built into SketchUp.
Fusion 360 and FreeCAD (both covered in our 3D software comparison) offer this capability natively. For complex projects with interdependent parts, the lack of parametric modeling in SketchUp quickly becomes a bottleneck.
The cut list requires a plugin — and that plugin demands discipline
SketchUp doesn’t generate a cut list by default. To get your parts listed with dimensions and materials, you need to install an extension. The most complete free option is OpenCutList, developed by the L’Air du Bois community. It’s a serious tool: it generates cut lists, nesting layouts, printable labels, and cost estimates directly from your model.
The catch: OpenCutList requires every part in your model to be properly created as a SketchUp component, with materials correctly assigned. If your modeling is sloppy, your cut list will be wrong. For a woodworker just starting out with SketchUp, reaching that level of rigor takes time.
On top of that, extensions like OpenCutList don’t work on the free version of SketchUp (SketchUp for Web). You need the desktop version, which means a paid subscription.
The free version is quickly limiting
SketchUp Free (web version) lets you take your first steps in 3D, but it blocks access to extensions, limits export formats, and makes navigation more cumbersome. For serious woodworking projects, it’s not enough.
The paid plans (SketchUp Go or Pro) unlock the Extension Warehouse and professional tools. This changes the cost equation, especially when compared to alternatives like FreeCAD, which is entirely free.
Setting up SketchUp effectively for woodworking
If you’re getting started, here are four steps to build on a solid foundation:
- Choose the right version. SketchUp Pro (annual subscription) or SketchUp Go for access to extensions. The free web version won’t serve you for long.
- Install OpenCutList from the start. Available on the Extension Warehouse, free and open source. Take the time to read the documentation before beginning your first project.
- Work with components, not simple groups. This is the golden rule for reliable cut lists. Each part = a named component with its material assigned.
- Use scenes to organize your views. Create one scene per useful view (front, side, cross-section, 3D client view) at the start of your model. This will save you considerable time at the end of the project when producing LayOut drawings.
The honest verdict: when to use SketchUp, when to look elsewhere
| Your situation | Our recommendation |
|---|---|
| You present your projects in 3D to clients | SketchUp is an excellent choice |
| You design furniture with many interdependent parts | Fusion 360 or FreeCAD will be a better fit |
| You want a cut list directly from your model | SketchUp + OpenCutList works, but requires discipline and a subscription |
| You’re looking for a truly free and parametric tool | FreeCAD is the best option |
| You need a fast, optimized cut nesting plan | A dedicated tool will be more efficient |
SketchUp and CutOptima: two complementary tools
SketchUp and CutOptima don’t do the same job. Used together, they cover the entire workflow from design to cutting.
SketchUp handles design and visualization: drawing the piece, checking proportions, presenting to the client, producing dimensioned plans. Once the design is approved and the parts list finalized, CutOptima takes over for cut optimization. You enter your panel sizes and the parts to cut, and CutOptima calculates the most economical layout to minimize waste and make the most of your material.
This complementarity makes sense: SketchUp isn’t built for cut optimization calculations. CutOptima isn’t a 3D modeling tool. Each does what it does best, and together they cover the full path from raw panel to workshop.
Want to reduce your waste and get more out of your panels? Try CutOptima for free — no installation, instant results.
Related articles
Best 3D modeling software: complete comparison
Comparison of the best 3D modeling software: Tinkercad, Blender, Fusion 360, SketchUp, Rhino. Pricing, strengths and limitations to help you choose.
Cut list software: how to choose?
Which cut list optimizer should you choose? Honest comparison: CutList Optimizer vs CutOptima. Decision guide for professional woodworkers.